Soap making is a fun and creative craft that’s become increasingly popular, and melt and pour (M&P) soap making is one of the easiest ways to dive in without the need for complicated ingredients or special equipment. Whether you’re looking to create personalized gifts, start a hobby, or even launch a small business, melt and pour soap making is the perfect entry point. In this beginner’s guide, we’ll walk you through everything you need to know to get started on your soap-making journey.
What is Melt and Pour Soap Making?
Melt and pour soap making is a straightforward process where pre-made soap bases are melted down, customized with fragrances, colors, and additives, then poured into molds to solidify. The great thing about M&P soap is that it’s beginner-friendly and doesn’t require the handling of lye (which is necessary in cold or hot process soap making), making it safer for those just starting out.
Why Choose Melt and Pour Soap Making?
- No Lye Handling: Traditional soap making involves working with lye, which can be dangerous if not handled properly. With M&P, you can avoid the lye altogether.
- Customizable: You can customize your soap with different colors, fragrances, and additives like herbs, exfoliants, and essential oils.
- Quick Results: The process is faster than other methods, and the soap is ready to use within a few hours after cooling and solidifying.
- Perfect for Beginners: With minimal setup and easy-to-follow steps, M&P is a great way to start experimenting with soap making.
Supplies You’ll Need
To start making your own melt and pour soap, you don’t need many supplies. Here’s a simple list of what you’ll need:
- Melt and Pour Soap Base: There are various types of soap bases to choose from, including glycerin, shea butter, goat milk, and olive oil bases. Each offers different textures and benefits for the skin.
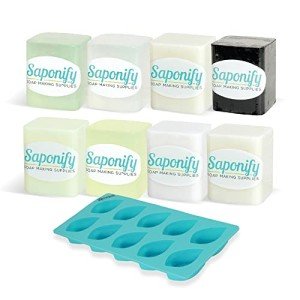
Handmade Soap Base Sampler Kit with Molds
Discover the joy of creating your own unique soaps with this easy-to-use sampler kit
Product information
Product links
- Fragrance Oils or Essential Oils: These add a lovely scent to your soap. Essential oils provide natural, therapeutic properties, while fragrance oils come in a wide variety of scents.
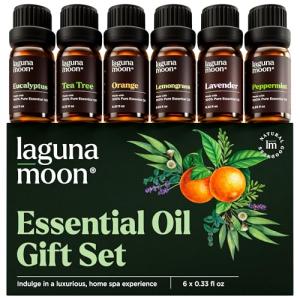
Essential Oils Set - 6 Blend Pack for Home
Transform your home with these delightful essential oil blends that enhance ambiance and uplift your mood
Product information
$9.95
Product links
- Colorants: Soap-safe colorants like mica powders or liquid dyes can be added to give your soap a vibrant hue.
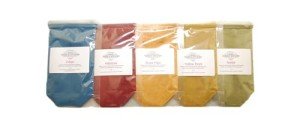
Natural Soap Colorant Sampler - 5oz Variety Pack
Add vibrant and natural hues to your homemade soaps with this exciting selection of colorants
Product information
$19.95
Product links
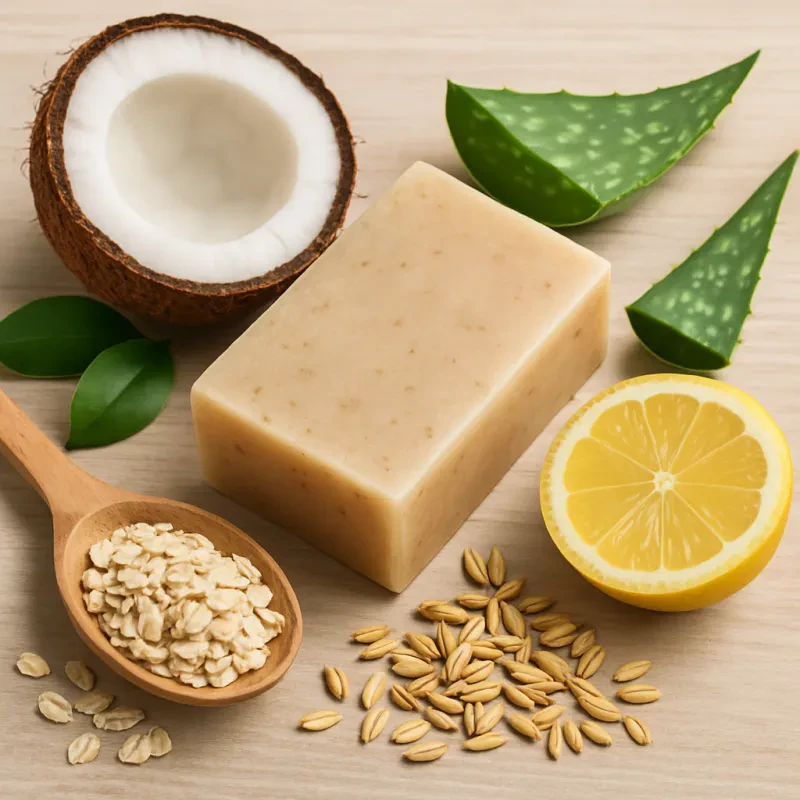
- Additives: These can include things like dried herbs, flower petals, exfoliants (like oatmeal or coffee grounds), or even activated charcoal for added benefits.
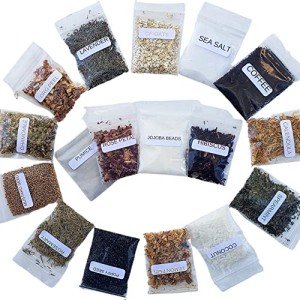
Natural Dried Exfoliants Kit for Soap & Crafts
Create refreshing and soothing soaps with our all-natural dried exfoliants, perfect for adding texture and beauty to your homemade creations
Product information
$26.99
Product links
- Soap Molds: You can use silicone molds, plastic molds, or even repurpose kitchen items like muffin tins or ice cube trays.
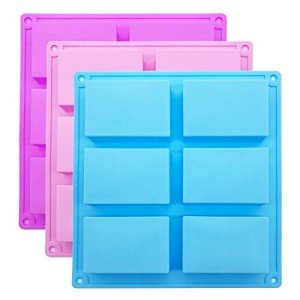
Silicone Soap Molds Set of 3 - Colorful Cavities
Create stunning shapes and designs with ease using these vibrant silicone soap molds
Product information
$7.99
Product links
- Microwave or Double Boiler: You’ll need a way to melt your soap base. A microwave-safe bowl or a double boiler is ideal for this process.
- Stirring Utensil: A spoon or spatula will be necessary to stir the melted soap and incorporate your additives.
- Spray Bottle with Rubbing Alcohol: This is used to remove air bubbles on the surface of your soap after pouring.
Step-by-Step Guide to Melt and Pour Soap Making
1. Choose Your Soap Base. Start by selecting the right soap base. Some popular choices include:
- Glycerin: A clear, moisturizing base perfect for colorful soap projects.
- Shea Butter: Rich and nourishing, great for dry skin.
- Goat Milk: Known for its gentle and creamy texture, perfect for sensitive skin.
- Olive Oil: Moisturizing and gentle, with a slight green tint.
2. Cut and Melt the Soap Base. Cut your soap base into small cubes to help it melt more evenly. Then, place the cubes in a microwave-safe bowl or a double boiler. Melt the soap base in short 20-30 second bursts, stirring in between, until it’s fully melted and smooth. Be careful not to overheat it.
3. Add Fragrance, Color, and Additives. Once your soap base is melted, it’s time to get creative! Add your chosen fragrance oils or essential oils (about 1-2 teaspoons per pound of soap base) and mix thoroughly. Then, add colorants, a little bit at a time, until you achieve your desired hue. You can also add natural additives like dried flowers, oatmeal, honey, or exfoliants, depending on your soap’s purpose.
4. Pour the Soap into Molds. Carefully pour the melted soap into your molds. Fill the mold to the top and gently tap the mold on the counter to remove any air bubbles. If you see any stubborn bubbles on the surface, lightly spritz the soap with rubbing alcohol to dissolve them.
5. Let the Soap Cool. Allow your soap to cool and harden for at least 1-2 hours. You’ll know it’s ready when it feels firm to the touch. If you’re in a hurry, you can place the molds in the refrigerator for about 30 minutes to speed up the process.
6. Unmold and Enjoy. Once the soap is completely hardened, carefully pop it out of the mold. If you find any rough edges, you can gently trim them with a knife.
Tips for Success
- Avoid Overheating: When melting the soap base, try not to overheat it. Overheating can cause the soap to lose its clarity or texture.
- Use Rubbing Alcohol: Spraying rubbing alcohol on the surface helps eliminate bubbles and gives your soap a smooth finish.
- Keep It Clean: Make sure all your tools and molds are clean and dry before using them, as any moisture can affect the texture of your soap.
- Be Creative: The fun part of melt and pour soap making is experimenting. Try layering different colors, adding textures, or mixing in herbs and essential oils that match the season.
Troubleshooting Common Issues
- Soap is too soft: If your soap doesn’t harden well, it might be due to using too much water or adding too many additives. Make sure to follow the recipe guidelines for optimal results.
- Soap is cloudy: If your soap turns cloudy after melting, it could be because it was overheated or mixed with too many additives. Try heating it on lower heat next time.
- Soap is sticky: This might happen if your soap didn’t cool down fast enough. Be patient and allow the soap to set for a few hours.
Conclusion
Melt and pour soap making is a wonderful, beginner-friendly way to start crafting your own skincare products. With just a few basic supplies, you can make soap that’s unique, personalized, and perfect for gifting or personal use. Once you’ve mastered the basics, you can experiment with different combinations of colors, fragrances, and additives to create your own signature soap creations. Happy soap making!